Today I am sharing a super easy and fun Halloween treat. I don't know about you guys but I AB.SO.LUTE.LY love caramel apples. I kind of have a thing for caramel. Anyways I hate how messy and how hard it is to eat those Heavenly treats. And don't get me started on kids and caramel apples. KIDS+CARMEL APPLES= HUGE MESS.
Well today we show you a fun and mess free way to have those delish caramel apples. They are called 'Apple Bites'
They are so easy to make and can be customized to meet everyone's likes.
Here is a list of items you need to make these cute 'Apple Bites'
-3 granny smith apples
-lemon juice
-butterscotch chips (butterscotch adheres better to the apples since they don't have skin on them anymore. Carmel will slide off easier and just doesn't stick well. Carmel can be used but they just don't look as pretty and will be lots messier to make.)
-toothpicks
-various toppings: peanuts, toffee, sprinkles, mini chocolate chips, coconut, white chocolate chips, m&m's, graham crackers, oreos, grasshopper cookies, rolos, the possibilities are endless.
Step 1:
I like to first get all my toppings ready. I put them all into their own individual bowls and chop whatever needs to be chopped ie peanuts, m&m's, etc... (and please don't judge me for my lack of cute, small bowls. I don't own any so my kids snack bowls will have to do:)
Step2:
After getting all the toppings ready I next wash and dry my apples. I then take my melon corer and begin coring the apple. Before doing this I thought I would need lots of upper body strength to core the apple but surprisingly it's pretty simple. If you don't have a melon corer you could use a small ice cream scoop or cookie dough scooper. But the smaller the better. Continue coring your apple until your apple is filled with holes. Then give your apple to your kids and let them finish off the rest of the apple.
Step 3:
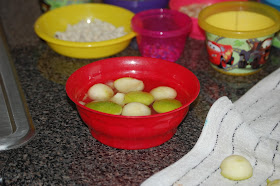
After you core your apple be sure to put your apples into a mixture of 1 cup COLD water and 1 TBSP Lemon Juice. This will make sure your apples don't go brown and yucky.
Step 4:
Line a cookie sheet with wax paper or parchment paper.
Fill a bowl up with butterscotch chips (as much or as little as you want...I did about a 1 cup or 1 1/2 cups) and heat in the microwave for 30 seconds. Stir then repeat until chips are all melted. Be sure to not over heat otherwise the butterscotch will burn.
Once your butterscotch is melted remove a few cored apples from water mixture and dry them with a towel so they aren't wet.
Take a toothpick and insert into the apple then dip them into the melted butterscotch and tap to get excess off.
Now for the fun part. Dip your apple bite into whatever topping you want. You can mix it up or just do one topping. I found they looked better if I put a little of the topping in a bowl then sprinkled the rest of the topping over it. And you may need to use your fingers to get the toppings to stick (some work better than others).
Make sure to let them sit for a while (I put mine in the fridge for 10 minutes). And the very last step is to enjoy.
Your kids will love making these and they are so easy to eat and they also make great neighbor treats.
Pin It


Visiting from the Idea Room linky party and I LOVE this idea. You are right...the apples are too big for little mouths and you end up with sticky-faced kids. Thanks for sharing-- I pinned this :)
ReplyDeletegreat idea that my kids will love! Thanks for a new snack idea. :)
ReplyDeleteWhy didn't anyone think of this before? Great idea!!
ReplyDeleteSo much easier to eat than a giant apple! Great idea!
ReplyDeleteMelissa
www.lovebugliving.com
What a smart idea!! It makes so much sense to make them small... Michael Ann is right, why didn't anyone think of this before? I think it's time for a patent :) You could make millions!
ReplyDeleteLisa @ Allergy Free Vintage Cookery
Looks delish!
ReplyDeleteWe'd love for you to share your recipes with us at
Simply Delish Saturday
Those are great! My kids aren't big enough for a whole apple so this clever idea is perfect! They look delicious!
ReplyDeleteI would love for you to link up at my TGIF Linky Party - http://livinglifeintentionally.blogspot.com/search/label/Linkey%20Parties
~Beth
These look so good and not that difficult! Just enough too and you won't break your teeth on these little guys)
ReplyDeleteI totally love this idea and will be doing it next year for sure. Thank you so much for sharing and for linking up to last weeks show and share. We hope to see you and your newest project on Wednesday.
ReplyDeleteA mommy's life...with a touch of YELLOW
tyandwhitneyulrich.blogspot.com